Your Big Time Saver: Integrating Zoho Forms with Zoho CRM
Your Big Time Saver: Integrating Zoho Forms with Zoho CRM
The Problem: Our database of past customers is out dated and we do not have the bandwidth to manually research each one to update them. By the time we can update it manually, information witll be out of date again.
The Solution: Ask your client or customer to review their information using a Zoho Form that maps the answers back to your CRM.
Yes, you can do that. Even better, you can push the data already in your CRM to pre-fill the form, which will improve the user experience for your clients / customers. To a certain extent, you can automate the process of adding and updating the data in your Zoho CRM using the Zoho Forms too. This integration allows you to push the form entries directly into Contact record and update data such as name, email, address, etc.
Once your form is properly created, you can create an email template in your CRM with a link to your Zoho Form. Then you can send the email out to as many contacts you wish (and yes, you can create a workflow to automate this too). When your clients complete the form, your CRM will be updated.
Woohoo! With a couple of clicks, you can save yourself hours of research and manual data entry
This also creates an opportunity for you to further improve your relationship with clients / customers. Perhaps a past client has not heard from you in months or even years. Sending out the right email to him/her could also be part of a win-back strategy. When you engage current customers, the email is more of a customer service message showing that you care about getting the details right. You may even want to turn it into a contest or integrate a simple poll.
How To Setup Your Integrated Zoho Form
If you want to get into the nitty gritty of how to build a Zoho Form, then review the user guide. This article will focus on the specific details of setting up the integration between Forms and CRM in this article. These are the steps you want to take to get started:
1. Build your Zoho Form with the fields you want to update. Below is an example showing common fields you want to collect. Check your CRM fields to be sure you have corresponding fields to map the answers to, especially any fields that are required in the CRM. You may have fields that you do not want or need the client to review or fill out, but they are required in the CRM.
In the Beckmann Collaborative CRM, we have a field called Journey which identifies a contact's status (Active, Inactive, Gone). You can create a field and choose the visibility of "hide field".
Bonus points to you if you make it more engaging in some way, such as adding a fun poll.
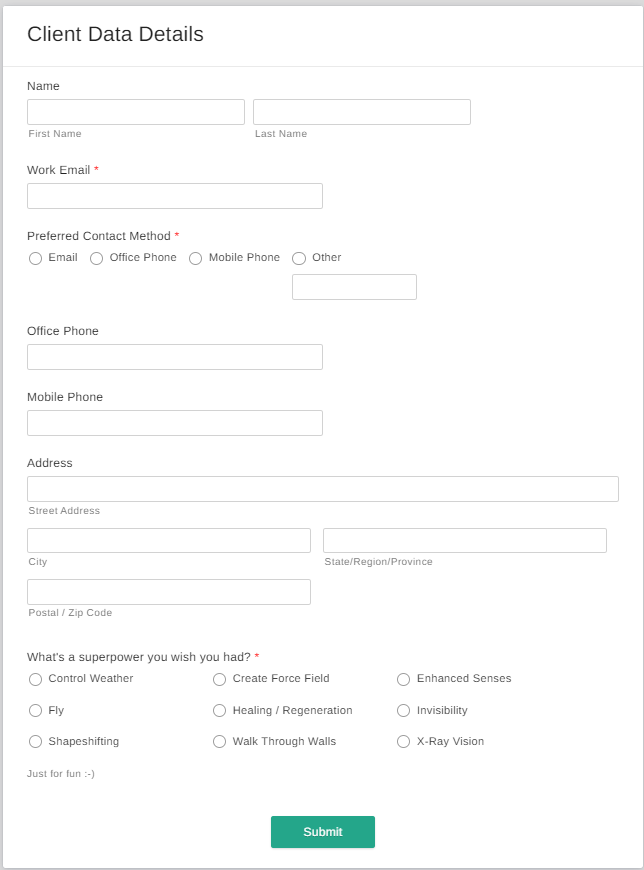
Here is an example form, if you're not sure what fields to add or what it might look like.
2. Activate Zoho Forms in your CRM. In the Zoho CRM marketplace (under your settings), click on the Zoho sub-menu and find Zoho Forms in the list. When you click on manage, you'll see the option to pre-populate data. Make sure that is activated.
This is a vital step in the process. Once you activate the pre-population of data, Zoho Forms will show up in your email templates and it will allow you to populate the form with information from your CRM.
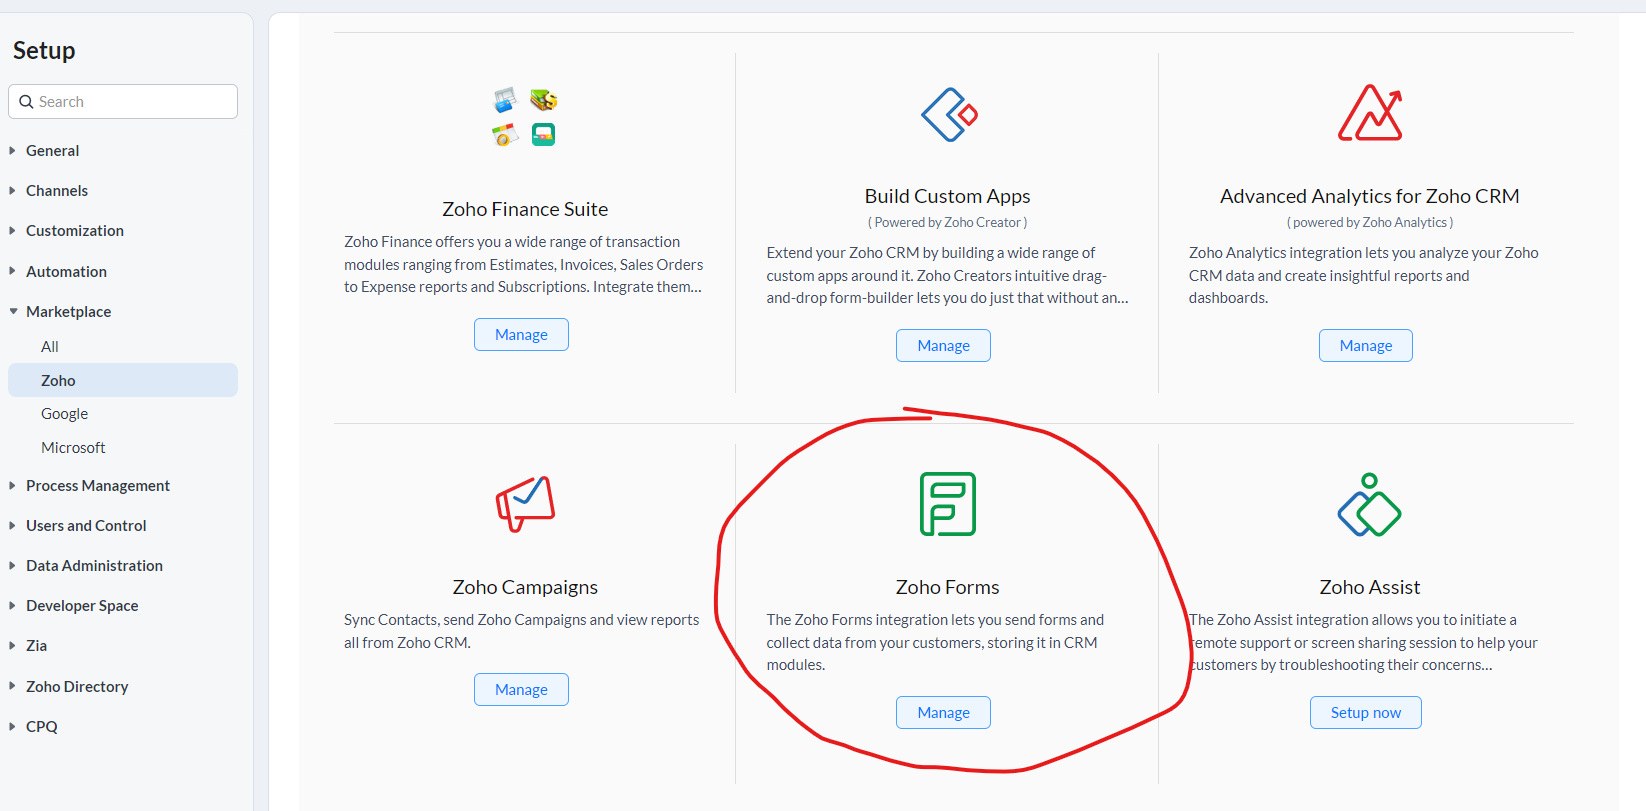
Click on the Manage button to see the setting that allows you to integrate with Zoho Forms.
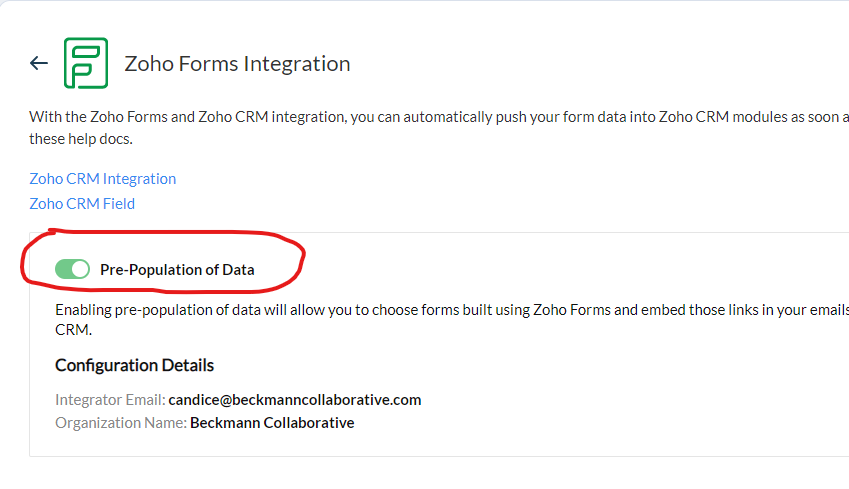
Turn on the option for "Pre-Population of Data"
3. Integrate your Zoho Form with CRM. Once you are happy with the fields and the look / style of your Zoho Form, click on the Integrations tab in Zoho Forms. This is where you map the fields from Zoho Forms back to Zoho CRM. Remember to click the "Upsert Record" option. And if you have any automations you want triggered after this form is completed, then check that box too.
You can also add to Related Lists such as a Task, Call or Note. We like adding a note to the Contact record when a form is submitted because it helps with tracking the last time we asked for an update. In the case of including the silly poll, we can also map the poll answer into a Note.
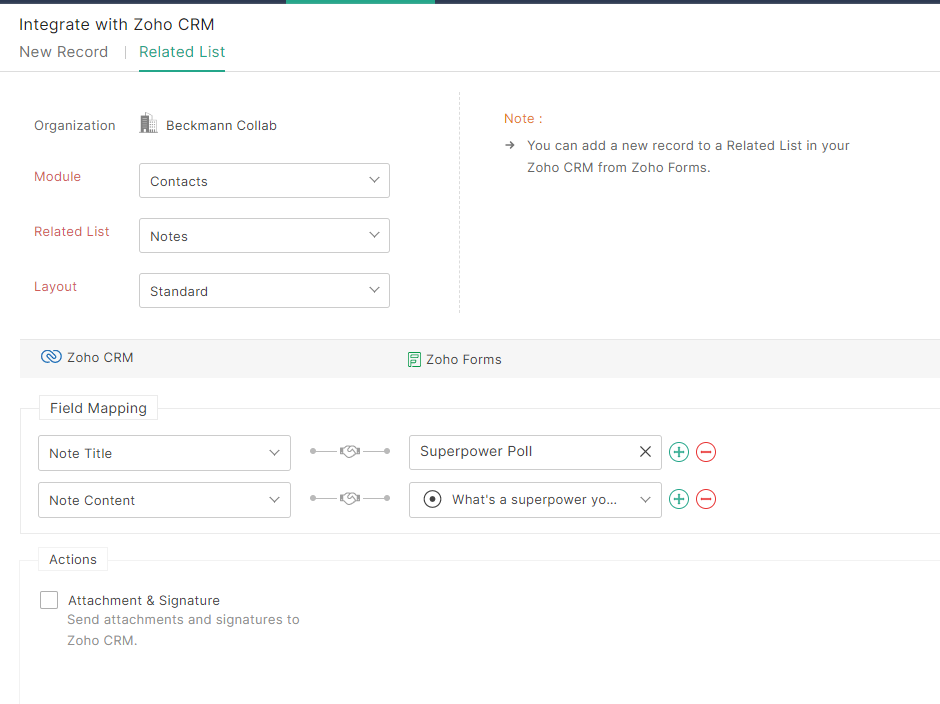
The second tab in the integration section allows you to update "related list" items such as notes, tasks, and meetings that will be connected with your Contact.
Then you will need to map the fields the same way you do for the integration from Forms to CRM. We also suggest changing the visibility of this field to "Hide".
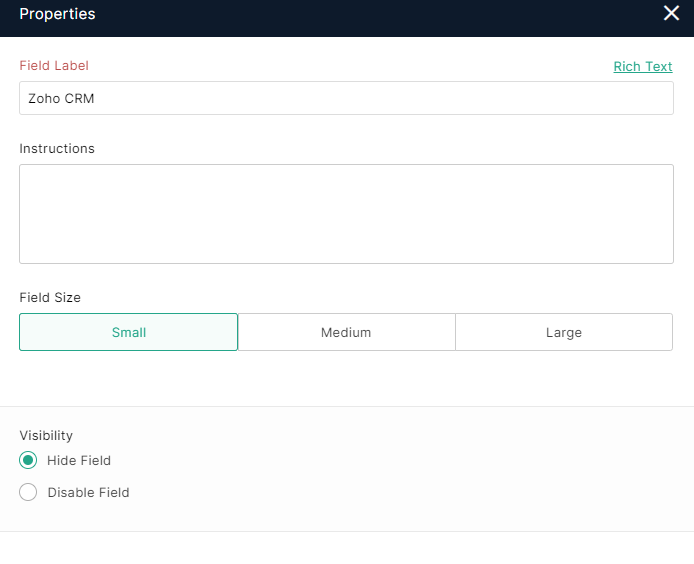
You'll want to hide the Zoho CRM integration field, so click on "Hide Field"
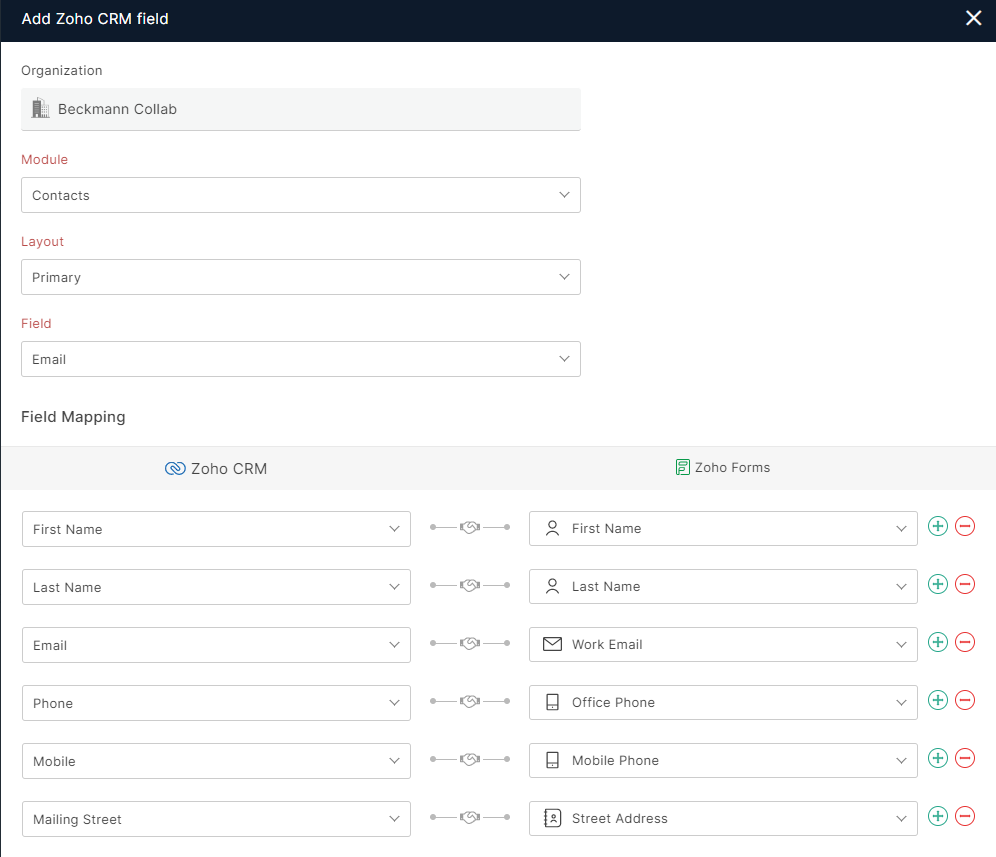
First you choose the primary field that is unique to your Contact. In this case, we chose Email address. Then you decide which fields in the form you want pre-populated with the data from Zoho CRM.
Keep in mind, the fields will be editable to the end user (your customer), but this helps reduce the work for him or her.
5. Email Your Contacts. With your form created (and in a theme / style you like), it's time to make an email to send out to your Contacts. In your Zoho CRM account, go to Customization and choose Templates. Create a new email template for the Contacts module. Write your email copy. Keep in mind that the email subject line and copy are important, so be sure to carefully craft it based on your audience.
To insert the link to your form, click on the link icon in your editor. You'll find there is an option in the dropdown list to pick a Zoho Form. This will generate a unique link for each contact that pre-populates your Zoho Form.
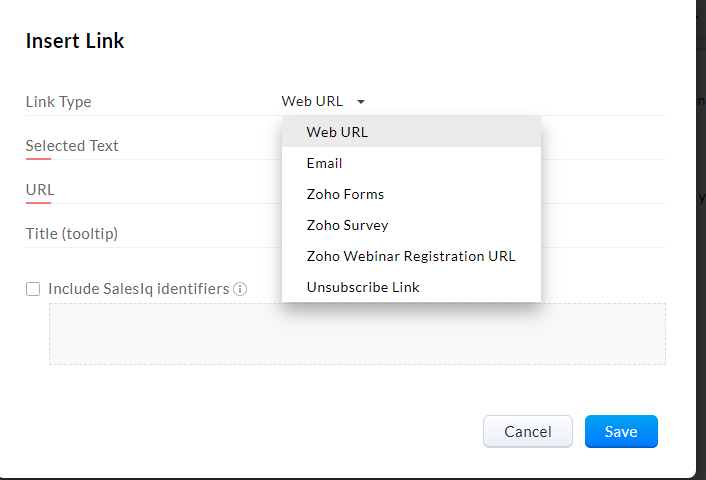
When you are creating an email template in Zoho CRM, you can insert a variety of different types of links. Now that your Zoho Forms account is integrated with CRM, your activated forms will be accessible through a link.
This will be a unique link for each Contact and it will pre-populate your Zoho Form with their information (per the mapping done in the previous step).
Web forms are an excellent way to keep data from your clients updated and strengthen relationships at the same time. The strategic use of Zoho Forms can be the answer to your CRM database maintenance.
If you want assistance with setting up a flow like this one, then feel free to reach out to us. We are happy to offer guidance and support to our fellow Zoho users.